Saturday, May 23, 2015

Coconut Oil Granola Bars

 I've really cracked down on what we're consuming in this house, and it hasn't been easy! Everyday I'm finding different alternatives to our unhealthy habits, and I've really gotten strict on myself. My number one struggle though....chocolate. I can't remember a day when I haven't craved chocolate! In an effort to come up with another substitute for the unhealthy processed junk we eat, I asked SS today if he wanted to make some granola bars. Of course his answer was yes, because he loves helping me cook...and my cooking (; "best cooker ever" as he says, gets awarded to me every night! You wouldn't be able to tell it from the past few posts, but we've been doing pretty well! I actually haven't posted anything in a month looks like, and the last few previous posts are weeks old! So from now on, besides one thing coming up, you will be seeing much healthier recipes and alternatives!


Ingredients:
2/3 cup coconut oil
2/3 cup peanut butter - I used 1/3 cup crunchy and 1/3 cup creamy because I don't have any nuts
2/3 cup honey
2 1/2 cups old fashioned oats
1 cup chocolate chips or any other add-in you like
Examples....nuts, raisins, cranberries, apriocots...
I also added in some cinnamon...you could also use vanilla extract, pumpkin spice, just about anything....
This truly is a customized snack, and I love that! You can make something different every time!


The trick to really making this healthy, besides the coconut oil, is if you use organic or natural ingredients. I just used what I had on hand, but I would definitely recommend natural honey, and organic peanut butter if you have it, and can afford it. You can also use gluten free oats, and dark chocolate chips. Use whatever you like!

Mix together your coconut oil, peanut butter, and honey. Melt in the microwave for 30 seconds and let it cool. I also added in some cinnamon. In another bowl mix your oats and chocolate chips. This of course I also added some cinnamon to as well! After your coconut oil mix cools down, thoroughly combine the two mixtures.


Line your baking dish with parchment paper, and press the mixture into place. The larger the dish you use, the thinner your bars will be. I like my bars thick, and I don't have much room in my fridge with all the food prepping I've been doing. So I used a square baking dish. Put the dish in the refrigerator for a few hours or overnight until hard, and cut into bars, shapes, cubes, whatever you like.

These turned out perfect and SS squealed with excitement that they were delicious! I think we have a new favorite. I can't wait for Hubby to taste them! Try these out and let me know how you like them!

Bagel Pizzas

Hubby and I were starving and it was a lazy relaxing day, so I didn't feel like cooking. We ran to the store real quick, and grabbed some bagels and pepperoni. I had some pizza sauce that had been sitting in the cabinet for months and it sparked an idea while scrolling through Twitter...bagel pizzas!


Ingredients:
Bagels
Pizza sauce
Mozzarella cheese
Pepperoni or other toppings of your choice

I'll let the pictures do the talking....(:


Turn your oven on to broil and sit them on the top shelf for 2-3 minutes. After a minute or two watch them until they're melty and crispy. DO NOT turn your back on them! The second you do, they'll burn quicker than you can blink. SS LOVES these, and they're actually quite filling. Its music to my ears when my boys tell me their full, so this is a great easy lazy day meal or even a snack. Try it out!

Easy Apple Crisp

We had lots of little apples that needed used up and I was in a super baking mood! This was the same day I made the no bake cookies, actually....So I was on a roll! When Hubby and I began dating, one of the first things he asked me was what was my favorite kind of pie. After I answered apple, he told me I was perfect. LOL, So we love apple pie and apple flavored things in this house! He is always coming home from work with pocket fulls of apples, and they're one of all of our favorite snacks!


Ingredients:
1 cup flour
1 cup brown sugar
1/2 cup of butter or one stick
3 big apples or 6 small apples
Ground cinnamon - as little or as much as you like


Start by peeling and cubing your apples. I loved this because I get to use my nifty little peeler contraption Hubby got me. I LOVE the time I save with this thing! And SS loves to turn the handle and eat the peels. I also love my apple slicer because I SUCK at cutting apples!


Generously butter a baking dish and spread out your apples. Top them babies with some cinnamon! Yummm!!! Preheat your oven now to 375 degrees. In a large bowl, mix your flour, brown sugar, and butter with a pastry cutter. Add in some cinnamon to this too if you like! Ya'll know I did! When your mixture is clumpy, and not fully mixed, top your apples with it. Bake 30-40 mins until golden brown.


I promise, your house will be filled with the most amazing and perfect smell ever and you will want to dig right into this! Top it off with some home style vanilla ice cream, and you're good to go. You will thank me for this. I guarantee it. Try this super easy recipe out and let me know how you like it!

No Bake Cookies

If you've never had no bake cookies, you haven't lived... My Mom makes these and they're by far my favorite cookies ever. I can't eat enough of them!! I introduced these to Hubby and he's in love as well! SS loves to help me make them. He seems to have a thing for asking me how I make everything. I mean, EVERYTHING. Breakfast, his lunch, dinners, desserts, snacks...Curious 4 year old! I swear I ate one of these every night and maybe one or two during the day. Shush. They're just too good!!! Next to good old fashioned chocolate chip cookies, it doesn't get much better than this.


Ingredients:
1/2 cup butter
1 cup sugar
1/2 cup whole milk
4 tbsp cocoa
1/2 cup smooth peanut butte
3 1/2 cups quick oats
2 tsp vanilla


In a saucepan, mix the first four ingredients together. Bring to a rolling boil, and let cook for 1 minute. In case you don't know, a rolling boil is when you stir the mixture and your stirring does not disrupt the boil or slow it down.
( little SS hands :D )


Next, add the last three ingredients and mix WELL.
Note...do not take sauce pan off heat like in the picture! I did this mostly for a picture. You want everything to mix together while it's hot or your cookies will not harden, and will be sticky.


Drop mix onto parchment paper into cookie sizes, and let cool for a few hours until hardened.

Please, please, please....eat these! You will never be happier you ate a cookie. Try this yummy recipe out and let me know how you like it! (:

Monday, April 27, 2015

Chicken Fried Steak with Country Gravy

THIS. WAS. SO. DANG. YUMMY!! This was my first time making anything like that, and first time making gravy. I'm not a big gravy person, but I couldn't have imagined eating this dish without it! We all scarfed our plates down, and I could have licked it clean! So yummy. So yummy. SO YUMMY!!!


Ingredients:

Cube steaks -
3 lbs of cube steak
1 - 1 1/2 cups milk
2 large eggs
3 cups all-purpose flour
Season salt
Few dashes of Cajun seasoning
Lots of black pepper
Canola oil for frying

Gravy -
1/3 cup flour
2 cups of milk
Lots of salt and pepper

Mix your eggs and milk in one shallow container. Mix flour, season salt, Cajun seasoning, and black pepper in another. Begin by seasoning both sides of each of your cube steaks. Dip in your egg mixture and coat each side, then your flour mixture. Coat in the eggs again, and the flour again. 
Heat oil in a skillet over medium heat, and cook your steaks about 2 - 2 1/2 mins on each side until the edges are golden brown.

For your gravy, don't clean that pan! Sprinkle 1/3 cup flour evenly over the grease. Using a whisk, mix flour with grease, creating a golden-brown paste. Keep cooking until it reaches a deep golden brown color. If paste seems more oily than pasty, sprinkle in another tablespoon of flour and whisk.Whisking constantly, pour in milk. Cook to thicken the gravy. Be prepared to add more milk if it ends up too thick. Add salt and pepper and cook for 5 to 10 minutes, until gravy is smooth and thick.


We served with homemade mashed potatoes, and corn on the cob which my Hubby made, and seasoned green beans! It was all perfect! Almost embarrassed to say Hubby ate three steaks....but, they were that good...I don't blame him. SS ate a whole cob and a half of corn!! He just kept wanting more halves! All around, it was a great night and we went to bed with happy bellies. TRY THIS!!!

Sunday, April 19, 2015

Mug Brownie

As I've been trying to detox and eat better, I've of course had some cravings. My biggest craving for as long as I can remember has always been chocolate. Almost every night I have cravings. I've been a good little girl since moving into my own home, and keep the sweets to a minimum during our grocery trips. But when I was, of course, browsing through Pinterest, Hubby and I both craving something sweet, this one hit me hard!


Now you'll notice I'm not using my typical Simplemente Delicioso cook ware for this recipe because not only is my Avenger's mug my favorite and biggest, but it's best to make this in a mug with a flat bottom.

Ingredients:
2 tbsps unsweetened cocoa powder
2 tbsps brown sugar
2 tbsps flour
Dash of salt and sugar
1 tbsp of vanilla extract
2 tbsps canola oil
2 tbsps water

This is easy to double or cut in half. I started out with the cut in half recipe because this is RICH. Mix your dry ingredients thoroughly so that there's no clumps. Then mix in your wet ingredients making sure there's no bubbles of dry ingredients not mixed in. Scrap the bottom corners of that mug! Microwave for one minute. 30-40 seconds if you half the recipe.


Top it with some yummy ice cream and you're good to go! My favorite part is when the ice cream melts and mixes with the brownie. Um, YUM!!!


This is easy to make as a little snack. Hubby asked for one in his lunch for work. And it's a super quick sweet treat without needing to buy a box mix, wait forever for a batch to cook, or dirty up a bunch of dishes! Try it out and let me know how you like it! (:

Mammaw's Macaroni Salad

This is 100% the ONLY macaroni salad I will ever eat. I could eat it the rest of my life if I had to, it's that good. I never liked macaroni salad until I tried my Mammaw's during a holiday dinner. Ever since then, I demand she make it every time I see her. This is the first time I've been brave enough to make it myself, and I'm pretty satisfied! Not so satisfied that I have to eat all this myself! But, it's too good to be too upset.

It's pretty simple!

Ingredients:
Cooked elbow macaroni
One large cucumber, seeds spooned out
One tomato, seeds spooned out
One green pepper, seeds spooned out
One onion
Two stalks of celery
One- two large pickles
Three-four hard boiled eggs
About 2 cups of Duke's mayonnaise
Salt and pepper

Cook your macaroni and eggs while you dice up all of your cleaned vegetables. Mix in a large bowl, and that's it! Make sure you stir it often and salt and pepper it. It can keep for about 3-5 days. Try out this deliciousness and let me know how you like it! (: Makes me miss my Mammaw and Pappaw at each bite.

Wednesday, April 15, 2015

Under 500 Calorie Lemon Chicken with Asparagus

I don't why I do it to myself every single time. I'm constantly going to the grocery store or running errands without eating. Hubby took a break from work today so we could get some grocery shopping done before SS comes back home. We slept in as long as we well deserved, and headed to the bank and grocery store. Of course, without eating, like we said we needed to first the night before. So after seeing all the yummy food at the store, and grabbing a thing or two that wasn't on our list, we ended up at a fast food restaurant with bellies growling and aching. I've been trying to slowly get back into eating better, so I was immediately regretting the decision as we walked in the door.

Once we were settled at home, got some cleaning done, relaxed awhile and caught up on our favorite shows, we started to get a little hungry. We got some asparagus at the store to try, since neither of us have had it before, and we're trying out new veggies to start adding to dinners instead of our usual broccoli or peppers. So OF COURSE, I took to Pinterest. We bought lemons today for a recipe I will be posting next week, so when I saw this recipe I immediately checked it out. Once I saw how easy it was, and that I had everything it needed, I showed Hubby and our mouths began to water. Also gave me a chance to cook with lemon pepper seasoning for the first time....one of Hubby's favorites from his parent's home. It's not a super pretty dish despite how hard I tried, but it was absolutely delicious, and I was tempted to lick my plate clean.


I hate when recipes give exact measurements to things when it's as simple as a pinch of salt, a dash of seasoning, or a drizzle of honey.... so here are the ingredients....

Boneless skinless chicken breasts (one for each serving)
All purpose flour (wheat flour was originally used in the recipe so it would probably be pretty good...healthier, too)
Pinch of salt
Butter
Lemon pepper seasoning (I used Mrs.Dash salt free)
Chopped asparagus
Sliced lemon
Honey


Sift some flour into a shallow bowl and mix with a dash of salt. Lightly coat your chicken on both sides and cook in a skillet over medium heat with some butter. Sprinkle each side of chicken with lemon pepper seasoning directly in the pan. Depending on how thick or thin your chicken is, it will take 3-15 minutes to cook on each side. Cook until cooked all the way through and remove your chicken from the pan. I also cut a lemon in half and squeezed half the lemon over each side as it cooked. I love the flavor of lemon!


There should be a little butter and yummy little chunks of seasoning in your pan. Directly place your lemon slices into the pan with asparagus on top. This will allow the lemon to caramelize in all that yummy butter and chicken bits. I would say I cooked it about 10 mins, squeezing some of the other half of the lemon over it all as it cooked, and a dash of salt and pepper. Make sure the lemons are lightly browned, and asparagus soft.


You're now done! How easy was that?! Top your chicken with some lemon slices, and drizzle it with a bit of honey...this balances the acidity, and is SO yummy when you get a little taste of the sweet. Turns out we love asparagus, and loved this dish even more! Plating Hubby's plate, I warned him that it probably wouldn't fill him up, but was pleasantly surprised (and extremely shocked) when he was satisfied by the end of his meal. We agreed that this was a really nice light taste after the heavy fast food we had earlier in the day. I was happy that I found some thing healthy (could always make healthier) that we both enjoyed, and that I was working more towards my progression into gettin back on it!

Try this yummy recipe and let me know if you like it! If you can get it to look prettier than mine, please let me see so I can be envious. (:

Saturday, April 11, 2015

DIY Vanilla Almond Milk Coffee Creamer

My Stepson loves "banilla milk" before bed. Just some milk in a sippy cup with a dash of vanilla coffee creamer. We were getting low on our collection of creamers, and instead of adding his vanilla creamer to the grocery list, I decided to make my own! This way is probably cheaper, and definitely healthier. None of those unknown ingredients and chemicals, and much better than most DIY creamers because I used Almond milk! I keep almond milk for smoothies, oatmeal, anything I want to make healthier than using our 2% milk.


Ingredients:
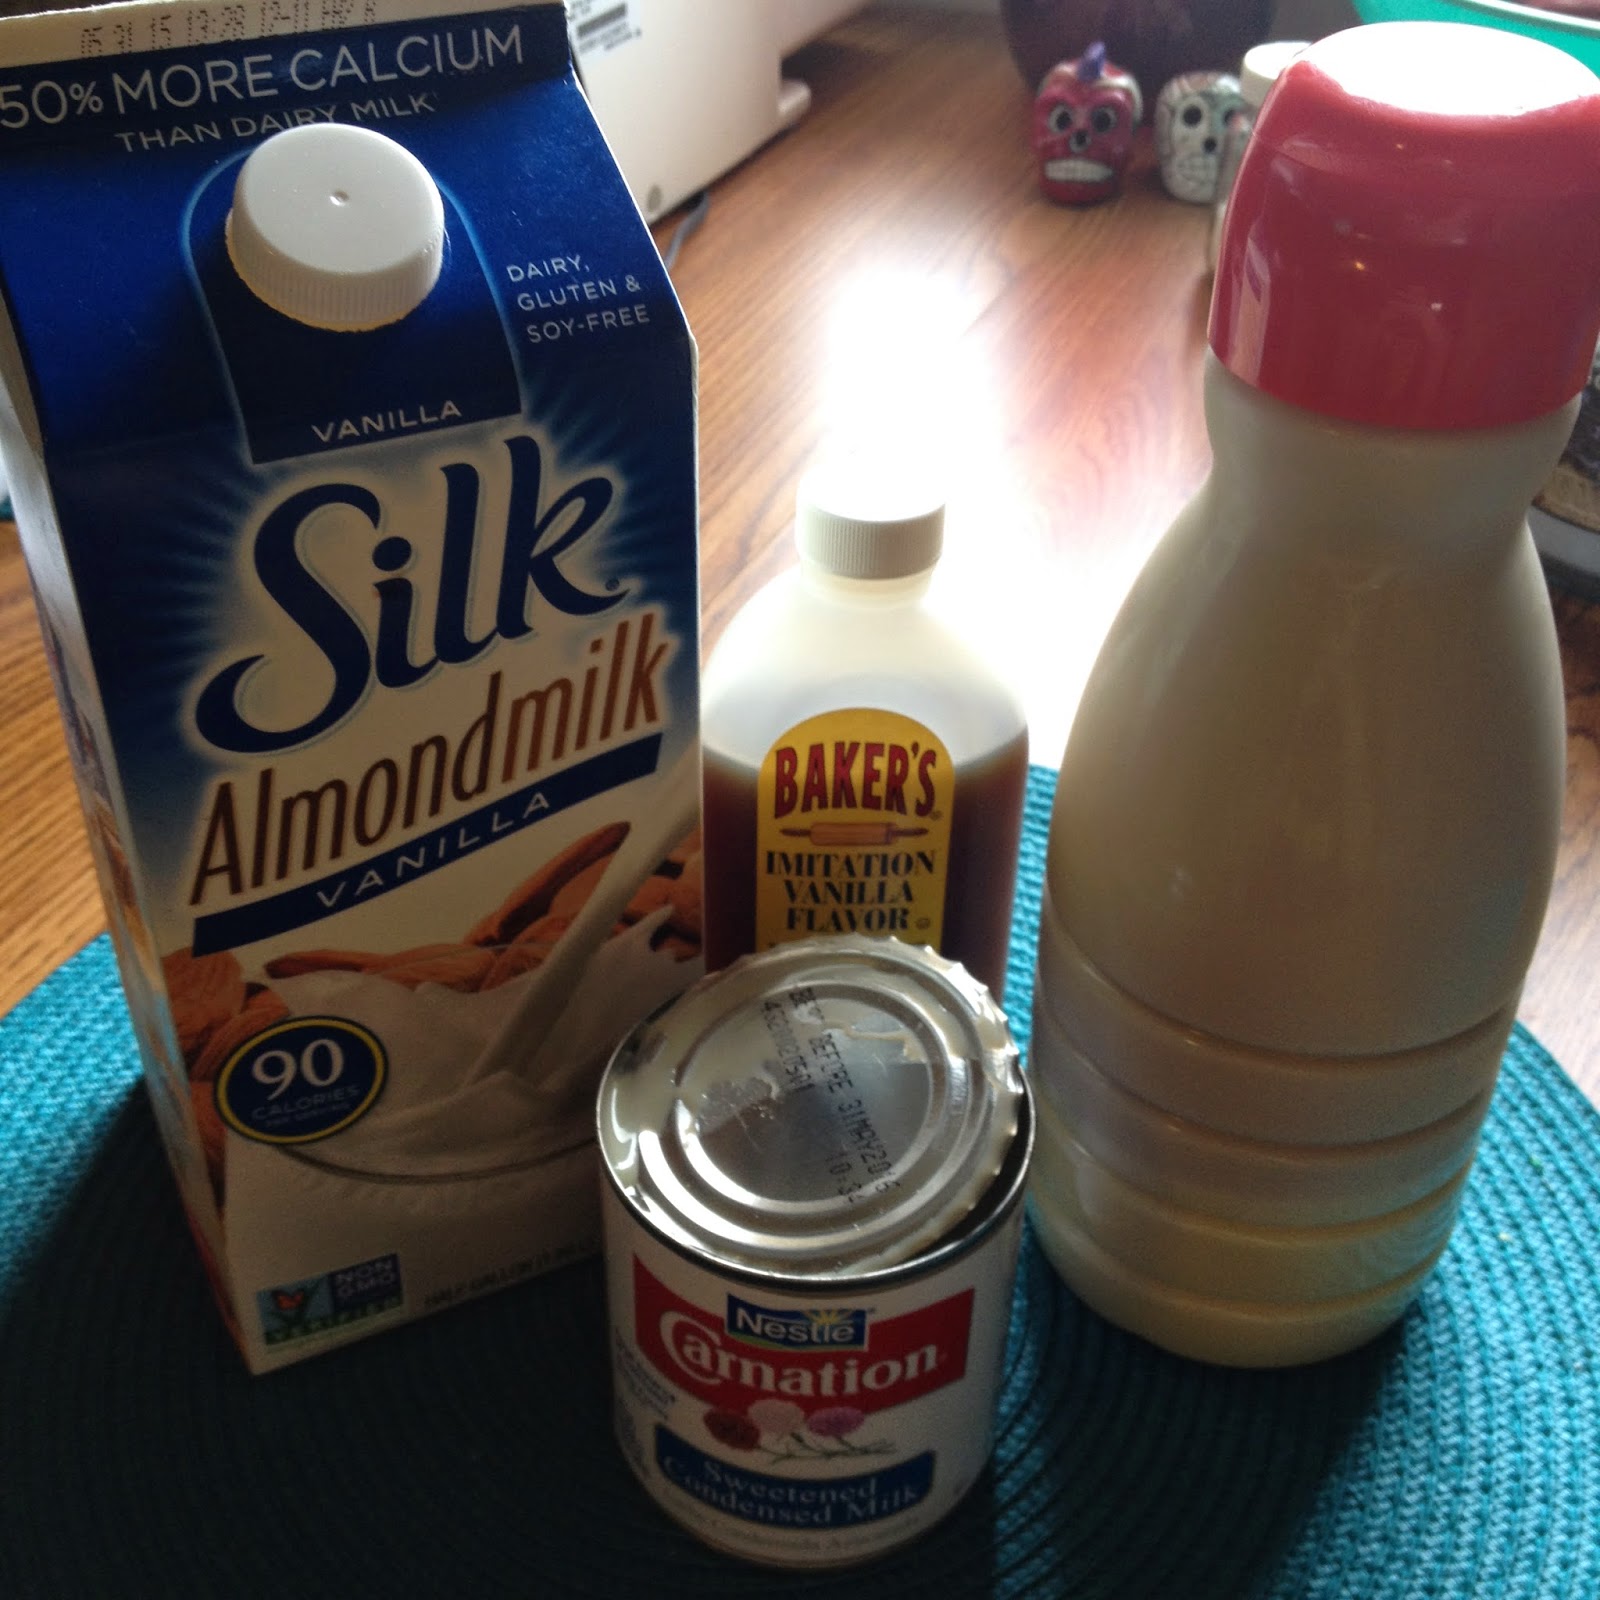
3 - 3 1/2 cups of vanilla almond milk
3 tbsps of Vanilla extract
1 can of sweetened condensed milk


Pour all the ingredients into your coffee creamer container. I had fat free Coffee Mate creamer, and 3 cups of almond milk fit perfectly. Unless you want to shake it up before you use it every time, mix it up in a blender. I used my magic bullet and it turned out perfectly smooth. This is DELICIOUS. I could pour it in a cup and sip on it all day. It tastes just as good as regular creamer, if not better. And I'll feel much better about giving it to my stepson since I know what's in it, and that it's not loaded with sugars. Try it out! (:

French Toast Two Ways!

French Toast is a huge comfort food to me. I learned how to make it very young, and have been making it for years. I love making it for my family, and my Hubby loves for me to make it even more! I have two ways to make it. The first is a sweet way, and the second is how I was told my Great Grandma made it. Both ways are delicious, and always make for a happy belly. If I wasn't suppose to be eating bread, I would eat a whole loaf of this stuff. It's that good. It's very common in West Virginia where I come from, but a lot of my new friends and family down here in Florida don't know how to make it! So here it is! (: 


Ingredients for the sweet way (makes 2 servings):
2 large eggs
A splash of milk
A splash of vanilla extract
Few dashes of cinnamon

Wish together the eggs and milk and make sure there's no clumps of eggs. You want to get it as smooth as possible so you're not just cooking eggs on top of a piece of bread. Mix in the cinnamon and vanilla and place a piece of bread in the mixture. Flip the bread on each side until it is evenly coated. Place in your greased pan over medium heat. I like to coat my pan in butter so it gets a pretty color and little bit of a crisp! You don't want to cook it too hot or the egg will instantly burn. Cook on each side until golden brown, and immediately top with some butter so it's nice and melted and soaked in while you make the rest of the french toast. Top with hot syrup and maybe even some powdered sugar.
This is what the mixture should look like -


Look at this yummy deliciousness!!


This makes two servings, but of course just one for my Hubby. I swear, I'm waiting for the day he blows up like a balloon. He still wasn't full after this.... Note: you'll want to add the powdered sugar first before the syrup or it will just absorb into the powdered sugar, causing you to not see it. And if you're like me, you'll add way too much! So if you're using powdered sugar, add it first! Also, one egg will make two pieces of bread. So say you're making breakfast for 5 people...you'll want to use 5 eggs to make 10 pieces of toast.


Ingredients for Grandma's toast (serves one):
One large egg
Splash of milk
Dash of salt
Few dashes of black pepper

Cook this exactly like the previous version. The mix should look like this:


This was MY plate since I'm TRYING to eat better.... LOL


So yummy and golden brown, and soaked in delicious butter. Yuuummmm!

This is easy to make healthier. You could use different milk, bread, butter, and eggs. Like wheat bread, skim milk, organic eggs, and fresh real butter. Could also serve with sugar free syrup. Make it your own and top it with yummy fruits or Nutella. Even peanut butter is wonderful!

Try it out and tell me how you like it! (:

Tuesday, April 7, 2015

Bourbon Chicken

This is a recipe my Mom made, and immediately sent me. I went over to her house the next day with SS and she let us taste some left overs. We loved it so much that she cooked us up some real quick! It's super yummy, filling, and can easily be tailored to the amount of spice you like. Of course, easy to make as well!


Ingredients:
2 pounds boneless chicken breastscut into bite-size pieces
1 tablespoon olive oil
garlic clovecrushed
1/4 teaspoon ginger
3/4 teaspoon crushed red pepper flakes
1/4 cup apple juice
1/3 cup light brown sugar
2 tablespoons ketchup
1 tablespoon cider vinegar
1/2 cup water
1/3 cup soy sauce
1 tablespoon cornstarch(if thick sauce desired)


Heat your oil in a large skillet and cook your chicken bits until lightly browned. Remove chicken from skillet.


Mix your remaining ingredients together and add to the skillet. Cook until evenly mixed and dissolved. 


 Add your chicken and bring everything to a hard boil. Let it simmer for 20 minutes, uncovered. Serve over rice! That's all (: You can even just eat the chicken plain, cause its that good! The sauce is delicious, and you can always add more or less red pepper flakes for different heat levels. Hubby topped his bowl with flakes and added hot sauce. Surprise, surprise. This didn't take long at all, and we ate it alllll up!! Try it out! (:

Monday, March 30, 2015

Sausage Fajitas


This is a super yummy dinner that is sure to fill you up! Typically, this could serve five or six people. But in my house of course, it's just enough for the three of us. You can eat this fajita style, or just eat it alone!


Ingredients:
2 red peppers
2 yellow peppers
2 sausage links
1 large onion
3 large potatoes or 5 small potatoes
Olive oil
Garlic powder
Salt & Pepper


I previously chopped up my peppers and froze them, which made the prep time so much shorter! But you want to chop up your peppers, onion, sausage, and potatoes. Mix them all up in a large bowl with olive oil, garlic powder, salt, and pepper. You can also substitute onions for onion powder if you don't have any.


Preheat your oven to 400 degrees and start putting your mix into aluminum foil boats. You can say a hand sized amount is about one serving, and want to make sure your foil ends will touch when they close so you can fold them over. Make sure the ends are tucked in and covered as well to avoid spills!


Fill up all your foil boats and bake for 40-75 mins. Depending on the size you cut your potatoes, you may have to cook at a different time. The smaller, the less time. This time I had to cook mine to about 75 mins to make sure they were soft. Usually I cut them smaller and cook them for 55 mins. They end up melting in your mouth and are my FAVORITE part of this meal. So just keep checking on them until it's just right.

Try this out and let me know how you like it! Like I said, you can eat these with tortillas to make them fajitas, or plain. You could maybe even add some cheese or extra seasonings to make it spicy. Also if you don't want so many servings, you can easily cut the recipe in half. One pepper each, one sausage link, half an onion, and less potatoes. Experiment with it and make it your own! You'll love it (:


Friday, March 27, 2015

White Chicken Chili

Yummy, yummy, yummy! My Hubby has never had white chicken chili before, so I've been anxious to make this for him! Of course it ended up being a little spicy for SS and I, but not spicy enough for Hubs.... The red pepper flakes and hot sauce made their usual appearance! None the less, this is still an awesome dinner. And bonus!...Crock pot!! I threw all the stuff I needed into the crock pot before heading out to go get stuff for our garden, and 4-6 hours later after all our shopping, exploring, and relaxing was done, dinner was ready for us! I love lazy cooking (:


Ingredients:

2.5 lbs of boneless, skinless, chicken breasts
2 cans of great northern white beans (can also use pinto)
1 can of whole corn (white corn would be awesome but I couldn't find any)
2 small cans of green chilies
One 32 oz container of chicken broth
2 packets of McCormick white chicken chili seasoning


Put your chicken in the crock pot along with your chicken broth, chilies, and seasoning. Drain beans and corn, and add those as well. Stir, cover, and cook on high for four hours, or low for six hours. That's it!

I used frozen chicken, so after 5 1/2 hours on low it was pretty much cooked, I shredded it up, and cooked another thirty minutes. We topped it with cheese, and crackers! Also, sorry for the dark picture... my over head light on the stove blew out ): But you get the idea! This smells sooo yummy, and has a good spice to it! If you don't like so much spice, use one can of chilies. If you LOVE your spice, add another can! But it has a nice balance. Try this out since its so easy, and let me know if you enjoyed it! (:


Crispy Mustard Ranch Potatoes

This is a little embarrassing.... This is one of my favorite foods, ever, that my Mom makes, and I got so excited about making it, that I ate half my bowl before taking a picture.... HAHA!
It was a lazy day the other day. Hubby stayed home to spend the day with us, and I knew dinner was going to be late. We were all getting a little hungry, and I finally had some bacon, so I thought..."YES! I can finally try some mustard ranch potatoes!" I was super excited.


I'm not a mustard person, at all. One thing I love is that my Step Son loves/hates all the same condiments as me. We love ketchup, and mayo, but hate mustard. Hubby is the opposite. We have lots of "YUCK" fights in this house! What's so weird to me is I really do not like mustard the slightest bit (besides honey mustard), but I absolutely adore these potatoes!! I think the bacon is what makes them so good. I could eat three pots of these, and still not be satisfied. I'm seriously in love. Now that I know how to make them, I'm even more in love, because now I can make them anytime I want!! This is a perfect side dish because you only need four ingredients that are usually laying around, and there's time for you to make all your other food while these are getting cooked up!

Ingredients:

3 large potatoes
Ranch dressing
Mustard
4 large bacon slices

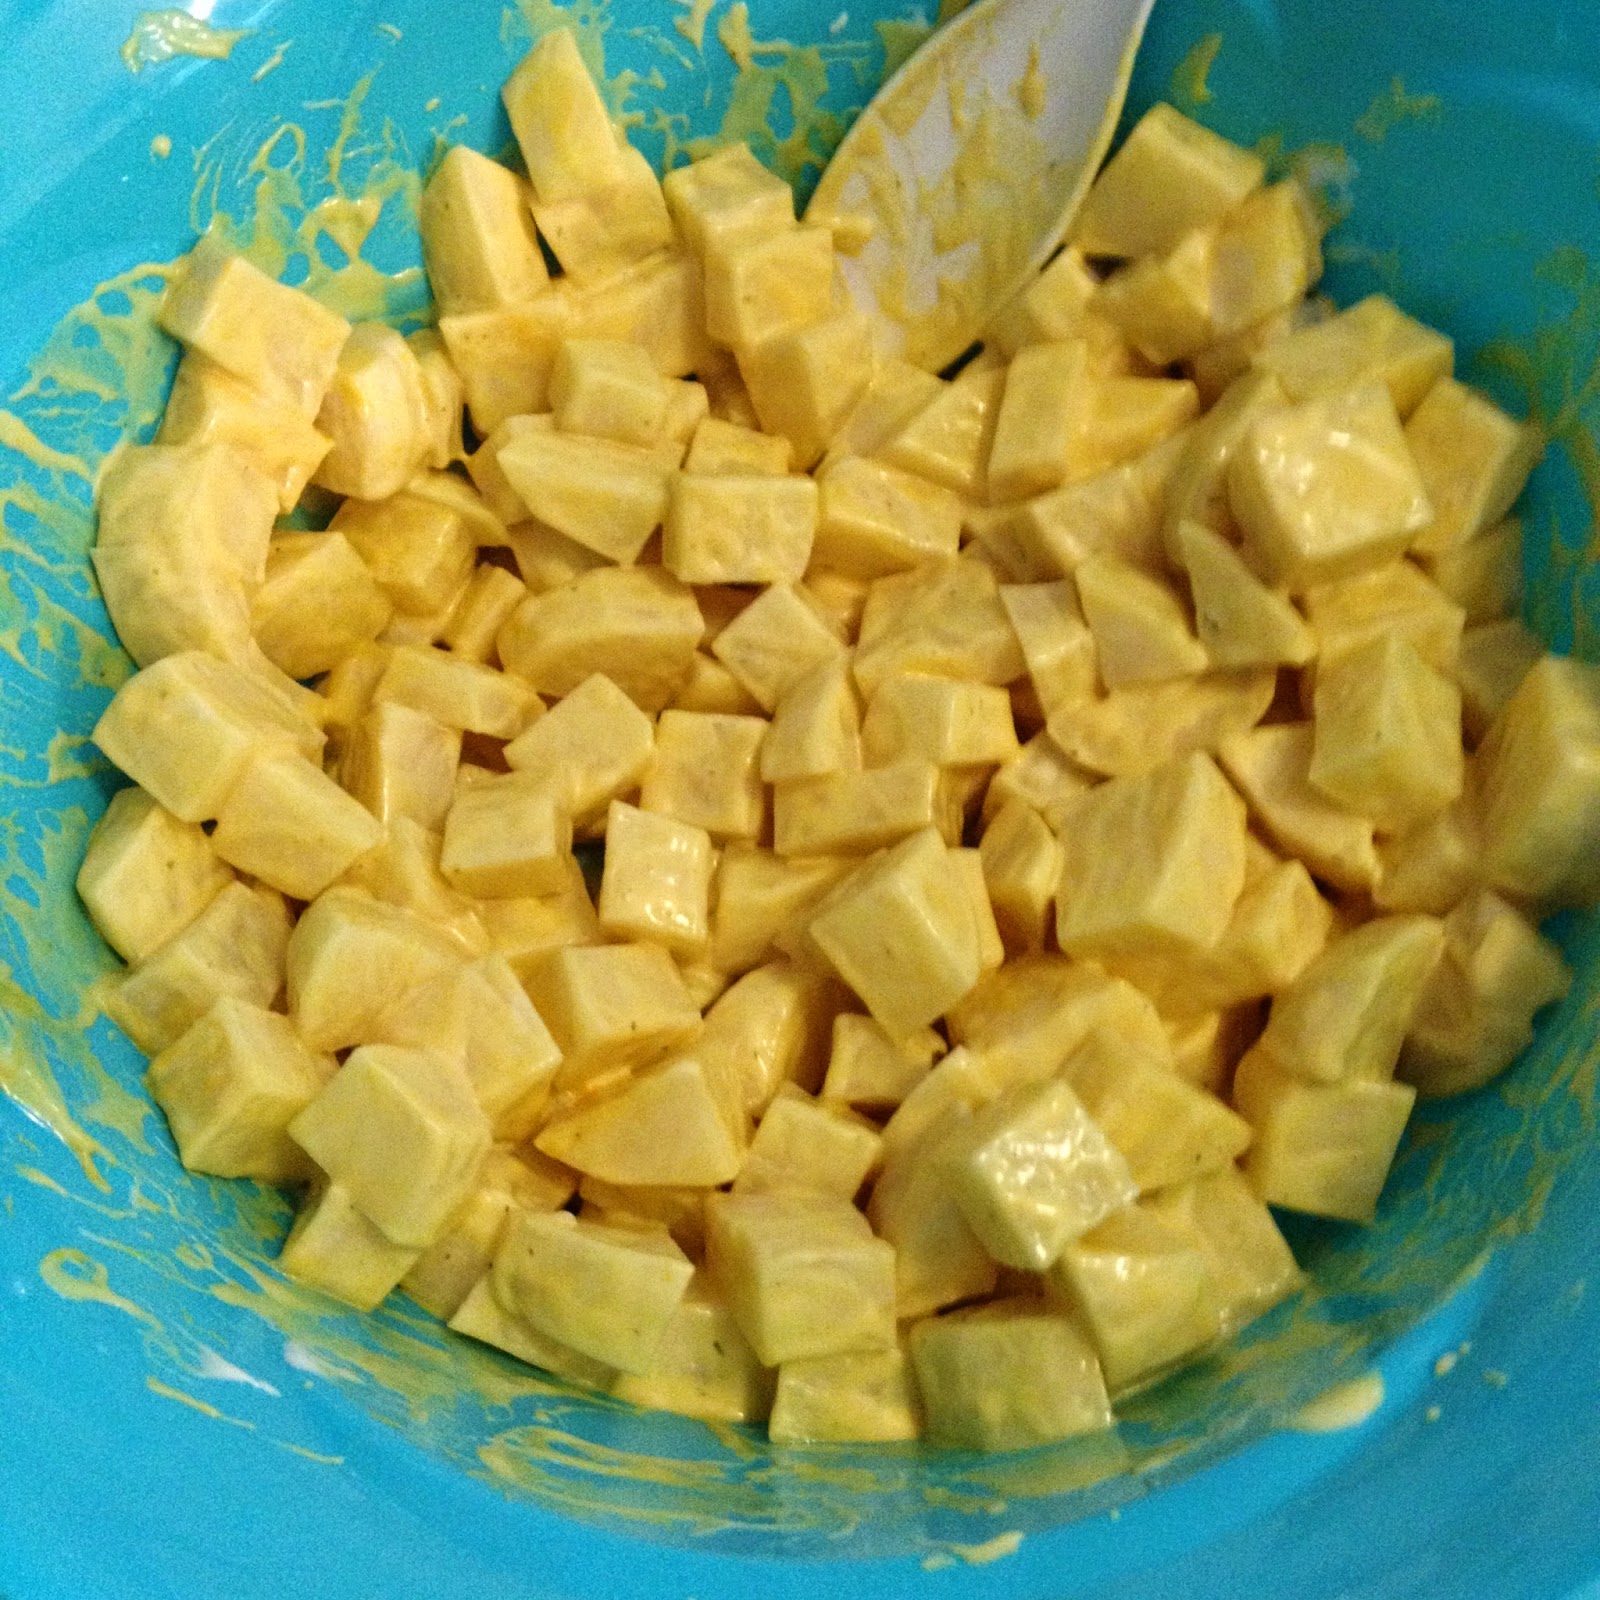
You first want to peel and cube, your potatoes. Once you're done with that huge task, mix them with ranch dressing and mustard. There's no exact measurement I can give you, so just put a little more ranch than mustard until evenly coated.


Chop up your bacon, and brown in a large pot. Over medium heat, add in your potatoes once the bacon is done, and stir. Cover the pot like you're going to cook fried potatoes, and keep covered until cooked. Once they're soft and browning, uncover the pot until they get to your desired crispness. That's all!

I could have let my potatoes get crispier, but I was getting too impatient, and every two seconds I heard SS "is the food ready yet?" But these are the boooommbbbb. Try them and let me know if you love them, too!

Mama's Homemade Creamy Mac 'n Cheese

Yet another of my, missing home and having cravings, recipes from my Mama, with no exact measurements. It's so frustrating sometimes when my Mom tells me some of my favorite recipes she makes because I want it to be as good as hers! She's made some of these for us our whole life, so she's become a pro at eye balling how much is needed in her recipes. Recently though, my interpretations have come out pretty great. This would be one of those!


My brother and I were basically raised on macaroni and cheese. Due to his Autism, it was one of the only things we as a family all enjoyed. I want to say a few years back though, my Mom started making this homemade macaroni and cheese. I don't think I'll ever go back!! The generic box stuff just isn't as good anymore. This is awesome as a side dish, which I used for the dinner I made in the photo. But we've made it our whole meal before! It's just that good, and you can't get enough of it.

Ingredients:

16 oz elbow or shell macaroni
Butter
Milk
Velveeta cheese
Shredded cheese (fiest blend, cheddar, mozzarella, any kind you like....)
Salt and Pepper

Cook your macaroni according to the boxes instructions. Drain, plop a big glob of butter into the pot, and cut a big hunk of Velveeta cheese. Cut it up into decent size chunks, add milk, and a big handful of shredded cheese. Salt and pepper to taste, and stir till melted. You can add more cheese/milk/both as you like, depending on the consistency you want. Once satisfied with your pot of gooey cheese, mix in the macaroni!

That's it! Super easy, and super yummy. My Mama also told me sometimes she seasons it with a little bit of nutmeg as well, so maybe give that a try! Let me know what you think, and if you love it as much as me!